

How To Turn A Flat Bag To 3d Photoshop
Making a 3D mockup to display a packaging pattern is a great technique that can give any designer an extra edge on their competition. Done right, mockups can heighten a pattern and help bear witness clients what the pattern would look similar if it was implemented in the existent world.
In this video tutorial, we're going to show you how to make a simple 3D mockup of a box in Photoshop.
A step-by-step version of the tutorial tin can be found below:
ane. Place your files
_
To set up for the mockup, nosotros created the foldout in Illustrator and made each side of the box into a jpg file.
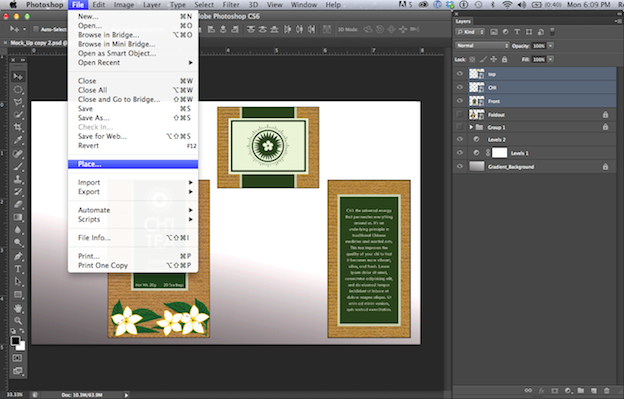
We start by placing 3 files into our Photoshop certificate. The 3 files are jpg of the meridian, front and right side of our box. Let'due south place them into the document past clicking File > Identify, and selecting each jpg file. As each placed files appears in your document, hit Enter.
2. Rasterize your files
_

Afterwards we've got all 3 files in Photoshop, we're going to rasterize them so that they tin can exist edited later on. Do this by selecting those three layers, click on the tab called Layers > Rasterize > Layers.
3. Utilize the gratis transform tool
_
In this pace, permit's start manipulating each of the iii sides to make our box look 3D.
First past selecting the front side of the box by clicking Edit > Free Transform. A choice box will announced. Now hold down the control key for Macs or the control fundamental for PCs, click on the eye dot on the side of the box you desire to dispense, and elevate it up a bit. Now it looks similar the front end side is at an angle.
Let's do the aforementioned to the superlative and right side of the box by clicking Edit > Costless Transform > Concord downwards the Command/Control Cardinal > Elevate. With each side, we're going to drag around the images' edges until the corners match up.
four. Trim off the back corner
_
Now that yous have your bones box shape, allow'southward add a couple of effects to polish it upwardly.
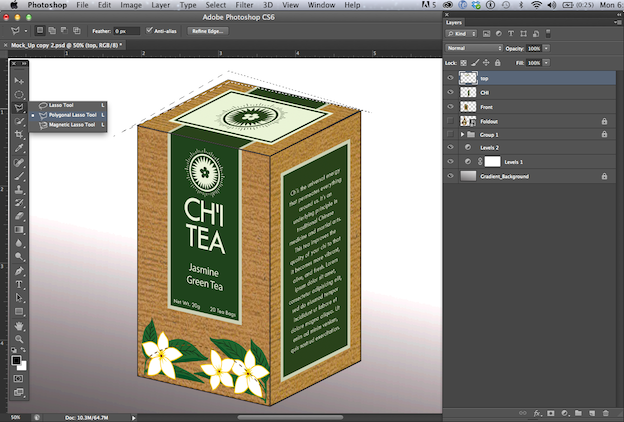
We're going to trim off the back corner to make information technology await a little more realistic. Let's do that with the Rectangular Lasso tool. Select a small segment of the elevation's back and left side with the rectangular lasso tool, and hit Delete. Side by side, click the "Select" tab, and select "Deselect."
five. Add a drop shadow
_

At present let's make a drop shadow under the box. We're going to brand a black square with the rectangle tool and misconstrue information technology using the Command/Command keys again.
Then, we'll move the new layer underneath the layers for the box itself. So when it's under the box we're going to click Layer > Layer Styles > Driblet Shadow > Adjust the drop shadow settings > OK.
6. Add together a reflection
_
For this, we're going to indistinguishable the forepart and correct side layers by clicking Layer > Duplicate Layer.
Now that nosotros have copies of the forepart and rights sides of the box we're going to rotate them so that they're sitting upside down under their copy. Do this by clicking Edit > Free transform > Rotate. Now that these duplicated layers are sitting straight under their originals we're going to make them faded at i end so that it gives the appearance of a reflection.
I'm going to select the layer for each of the reflections in turn, click the "Layer Masks" push, click the "1000 radients" push button and do a uncomplicated click and drag over the border of our reflection layer. This will requite you a reflection.
vii. Stop up with the brush tool
_
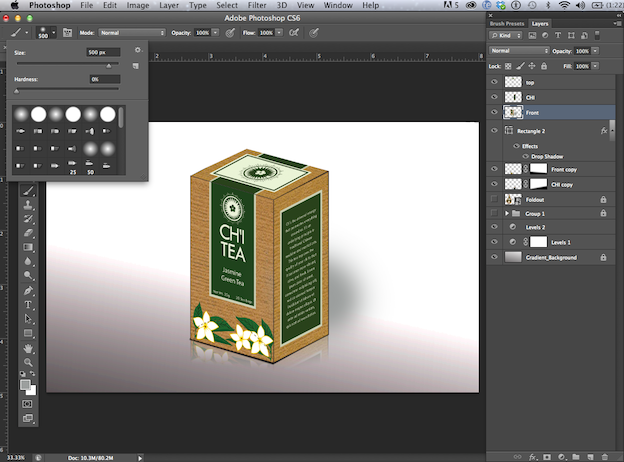
Lets add one final shadow in the back, using the Brush Tool. Nosotros're going to click the Brush Tool button and using a soft and feathery night greyness brush, we're going to utilise it behind all these layers. Now nosotros've got a slight shadow in the back.
Nosotros're going to do the aforementioned routine with the back side of the box, so nosotros'll all have a complete mockup!
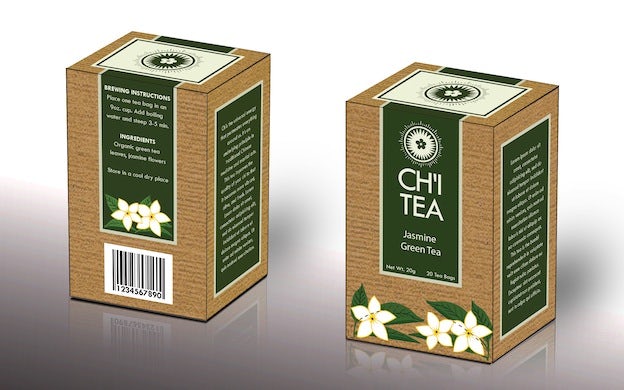
In that location's a lot of unlike ways to do a 3D mockup, such equally using fancier backgrounds and added effects, but even this uncomplicated one makes a huge departure in terms of presentation.
Got any of your own tips on making 3D mockups?
Source: https://99designs.com/blog/design-tutorials/3d-packaging-mockup-in-photoshop/
Posted by: hobbssouthe1959.blogspot.com
0 Response to "How To Turn A Flat Bag To 3d Photoshop"
Post a Comment